Workflow
A workflow is a set of instructions composed of multiple connected steps, typically used for automating batch data processing, such as in bioinformatics analysis pipelines. Bio-OS supports workflows described in WDL (Workflow Description Language). On the Workflow page, you can import a workflow, after which you can initiate computational analysis.
Import Workflow

Select Import Workflow, then enter the workflow name, Git address, Git project branch or tag, token, and the main workflow path. When finished, click Confirm.
Git Address: Enter the main address of the Git project here; do not include branch information.

Git tag: In Git, a tag is used to reference a specific commit. For example, on GitHub, when selecting a branch you can view and choose the desired tag. If no tag is available, you may also provide the branch name.

Git token:Since August 13, 2021, GitHub has removed support for password authentication and recommends using a Personal Access Token instead. You can find the Access Token in Settings on the left panel and copy it into the parameter field.

Git Main Workflow Path: Locate the workflow file you wish to import, click the copy button, and paste the current file path directly into the input parameter.

CallCaching:A feature in WDL (Workflow Description Language) execution engines, such as Cromwell, that allows previously executed tasks to be reused instead of re-run. When call caching is enabled, the engine checks whether an identical task—with the same command, inputs, and environment—has already been executed. If a match is found (a “cache hit”), the engine reuses the cached results rather than running the task again. This mechanism improves efficiency, reduces computational cost, and speeds up workflow execution.
Configure workflow inputs
To run a workflow on Bio-OS, you must specify all required workflow input variables.
Select the entity data model and choose the data.
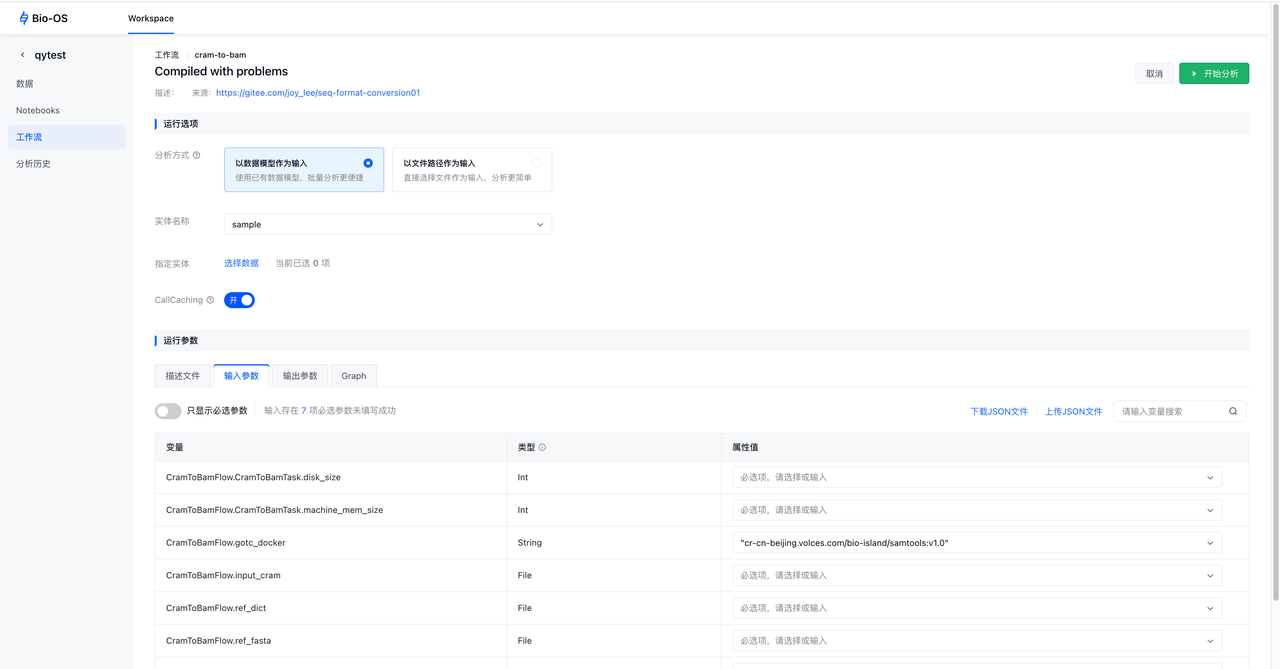
Configure input parameters
Click the Input Parameters tab to configure input values. Properties correspond to workflow input variables and may be integers, strings, or files. You specify inputs by selecting or filling in the property fields for all required variables in the setup form. Inputs can be provided by manually entering values, using this to reference parameters from the data model, or supplying property fields via JSON.

Examples of common property formats:
Integer:
50String:
stringArray (comma-separated):
[string1, string2]File path:
S3://analysis/sc94ra7leig43voqu4vlg/CramToBamFlow/5d915601-75c3-493b-9c7d-d136c9f9a296/call-CramToBamTask/execution/script
Methods for Recording Output File Metadata into the Input Data Table
Why write outputs into the data table? Writing outputs into the data table links workflow outputs to the corresponding input data files (i.e., outputs are recorded alongside the input files in the table). This helps organize results in a meaningful way and also makes it easier to use the data for downstream analysis.
Navigate to the Output Parameters Tab
For each output variable, click the property value field. A dropdown list will appear showing all columns available in the entity data model selected in the run options.
Select an existing column or enter a new name to add a new data column to the table. If the column does not exist in the original table, a new column will be created based on the name; if the column already exists, the new results will be filled in or overwrite the existing values.

Configure input and output parameters using JSON
What is JSON?
JSON (JavaScript Object Notation) is a lightweight, text-based data format that is easy for humans to read and write, and easy for machines to parse and generate. It represents data as key–value pairs and arrays, making it useful for storing and exchanging structured information across systems. JSON is language-independent but widely supported, and it is commonly used in web applications and APIs to transmit data.
When clicking the Input Parameters or Output Parameters tab, you can choose to download a JSON file. After editing, you can upload the JSON file to configure the workflow inputs or outputs.

For different workflows, JSON becomes useful when you want to reuse the same inputs in the configuration. For example, when creating a new configuration, you would normally have to manually enter all inputs each time, even if many of them are identical to an existing configuration. Now, you can download the inputs from a previous configuration as a JSON file and upload it to populate the new configuration.
Last updated